Flowers, Kit, Sale, Stampin up

Everything is Rosy Suite of Products Special May 1 – 31 only

cropped-04-01-19_header_q2_oop_nadb748f1b0be1686086dbff0000ec372d.jpg

I am in LOVE with this bundle! It just debuted today and features the following items:

Medley includes these exclusive products:
* Everything Is Rosy Photopolymer Stamp Set—18 stamps; suggested blocks: a, b, c
* Everything Is Rosy Dies—10 dies; largest die 2-7/8″ x 1″ (7.3 x 2.5 cm)
* 6″ x 6″ Designer Series Paper Stack—48 sheets; 8 each of 6 double-sided designs
* 6″ x 6″ rose gold foil paper—8 sheets
* Printed die cuts—2 sheets
* Rose gold die cuts—4 sheets; 2 each of 2 designs
* Rose gold adhesive backed mirror embellishments—60 embellishments; 1/4″ (6.4 mm)
* Melon Mambo 1/4″ (6.4 mm) Ruched Ribbon—10 yards (9.1 m)
* Night of Navy/Rose Gold 3/8″ (1 cm) Metallic –Edge Ribbon—10 yards (9.1 m)
* Rose Gold Shimmer Paint—1/2 oz. (15 ml)

150059G

All of this beauty for only $80.00! …But get it while it’s HOT! When it is sold out it is sold out!

Just look at these gorgeous projects you can make with all the pretty things that come in the kit! These are just a few!

04.01.19_800x800_q2_oop_6


04.01.19_800x800_q2_oop_3

04.01.19_800x800_q2_oop_9

Contact me at sweetpiecesbyme@gmail.com to purchase or click HERE. Be sure to specify me as your Demonstrator!

Sweet Stamping!

Charlene

Advertisement
Doggie, Sale-A-Bration, Stampin up, Sympathy Card

Happy Tails – Pup Sympathy Card

Hey All,

Hope you are having a great day, and if you are near Denver/Colorado Springs, I hope you made it through the blizzard. I miss the snow& those majestic mountains! I wouldn’t have minded a couple of snow days myself;)

Recently also in Colorado Springs, my mother had to put down their family dog, Dawson. He was the sweetest German Shepherd that I’ve ever known. A big, fluffy, sweet, bear of a dog. I will miss his heart.

I wanted to make her a sympathy card since I know that would cheer her up a little, so this is what I came up with. I made this quick, easy card in about 10 minutes. I even made a tutorial if you would like to check it out HERE

I made 2 versions of the card, which one do you like better? I’ve linked all the materials needed for the card below. Thanks for stopping by, and please comment to let me know you were here! 🙂

Big announcement coming soon!!! xoxo


Kit, Paper Pumpkin, Stampin up, Thank You

Paper Pumpkin February 2019 Grown with Kindness- Alternative Cards

Hi Ya’ll!

I just wanted to share with you 2 alternative cards you can make using all of the supplies in the February 2019 Grown with Kindness Paper Pumpkin kit. You do not need anything additional to make these! Unless you want to use your own adhesive.

Card #1: (The one on the left)

Items you will use:
1 Black Card Base
1 Piece of vellum, 1 Sheet of the succulents in the cups, 1 Sheet of the succulents

Let’s start with the first card and the measurements. I’m just keeping this high level, so if you would like the step by step, please check out my You Tube video HERE.

First you’ll cut the top off of the coffee cup succulent paper right at the top of the skinny cactus in the brown cup.  Cut the white part off so that piece will be 2″ x 1-7/8″. Save the other pieces with the little bit of green on it for the #2 card. Then turn it and cut it down the middle of that same cactus so that piece will be 3″ tall by 1-3/8″. Next cut the succulent paper into 3 sizes, 1-6/8″ x 1-3/8″, 2″ x 1-1/2″ and 2″ x 1-1/4″. Stamp your sentiment on the white piece in Fresh Fig. Then adhere all of the pieces cut as shown with the adhesive dots or a tape runner to the piece of vellum. Then turn it over and only put adhesive on the backs of where the paper is, so none of the glue will show through the vellum. Then you can adhere the vellum to the black card stock. Add 3 of the clear enamel dots and you are done!

20190223_204456978880731388758946.jpg

For Card #2:

Items you will use:

1 white card base, 1 piece of gray card stock, plus 1 other piece of gray,

1 Sheet of the succulents in the cups, 1 Sheet of the succulents

Stamp your sentiment on the white square that we set aside from Card #1. Adhere it to the gray card stock and cut around it. Just leave about 1/4″ border around it. Then you will cut 4 pieces of the succulent paper all the same size, 2-1/2″ x 1-3/8″. Adhere those evenly to the larger piece of gray card stock. Then tie the white baker’s twine around the back and adhere. I usually make a separate bow and then adhere that to the front with a glue dot. Adhere 3 clear enamel dots and then you are done!

I hope you enjoyed making these cards as much as I enjoyed making the tutorials!


20190223_2005076539193617388662139.jpg


Remember, if you subscribe before March 10th, you will get your 1st kit in March which will include an acrylic block and a full size stamp set! You can subscribe using my personalized link HERE.

I hope you had fun making these cards, I’ll be sure to post alternatives every month so please come on back to check them out. If you get a chance I would love for you to subscribe to my You Tube channel too 🙂 Then you will get first notification when I post new tutorials and do giveaways!

Enjoy!

Charlene xoxo

Kit, Paper Pumpkin, Sale-A-Bration, Stampin up

March Paper Pumpkin! with a Free Stamp Set!


https://www.paperpumpkin.com/en-us/sign-up/?demoid=2211286

Are you a subscriber for Paper Pumpkin yet?? If not, I have to ask why not? Let me ask you a question…how much do you spend on greeting cards per year?? Let’s do the math. I send at least 1-2 thank you’s a month, but I send more after my son and daughter’s birthdays. So that is, 2 x 12 = 24, plus about 10 x 2 = 20, that’s already 44 thank you’s. Then I send approximately 22 birthday cards per year, plus 8 Anniversary cards. IF I were to not be a cheapo, which usually I’m not and I do splurge on a semi-fancy card and spend about $5.00 per card, that is a whopping $370.00 a year! Now, you tell me, do you send that many cards? Let’s say you don’t have birthday thank you’s to send, ok, if we take off 20 cards, that’s minus $100, you still might spend $270.00 per year on cards. This is NOT counting cards for holidays! Do you send Christmas, Easter, Valentine’s or Mother’s Day cards? What about Father’s Day, Thinking of You, Get Well’s, etc!? So let’s be real, you might send those, so let’s add back on about 10 cards, not counting Christmas, because if you are like me, you send a pretty photo card. 😉 So take the $270.00 and add back $50.00, which comes to a grand total of $320.00. Did you even know you were spending that much on cards? Well, I do not. I spend $240.00 per year on Paper Pumpkin and have MORE than enough cards to send 96 cards per year. So, if I WERE buying 96 cards at $5 a pop, that would be $480! But I’m only spending $240… AND I do not just have 96 cards to show for it! I also have an acrylic block, 12 or more ink spots, 12 mini stamp sets, extra twine or ribbon (always!), dimensionals (pop dots) and glue dots! So worth it! Ready now? Sign up between now and March 10th in order to get the March kit!

Sign Up Here!

So, if my example wasn’t convincing enough, read on to see what you will get in the March kit!

  • The March kit features eight full-sized, mail-able cards
  • Coordinating colors are Basic Black, Bermuda Bay, Daffodil Delight, Flirty Flamingo, and Poppy Parade (these are GORGEOUS COLORS! – See below for examples!!)
  • This kit has an element that is sure to “pop”! (hmmm could it be balloons??)
  • The FREE stamp set is even bigger and better than your typical Paper Pumpkin stamp set and can be used on a variety of crafting projects.

AND….you can SKIP a month at ANYTIME! So, if you think you won’t have the money in your budget, just skip!

I hope you decide to try this kit, you will NOT regret it AND like I said, you can CANCEL at ANY time! 🙂 I will also be posting tutorials AND videos on alternate projects to make HERE, just in case you would like more ideas for your kit!

Sign Up Here!

Here are some of the colors that will be featured in the March kit!

Happy Crafting!

Charlene xoxo

Sale-A-Bration, Sophia, Stampin up

Back with Stampin’ Up! Yessss! – Let’s Get Creative!

Just a little note to say I’m back with Stampin’ Up! Right now is Sale-A-Bration, so I was able to purchase a new Consultant Kit for $99 + tax & FREE SHIPPING , and get $175 worth of products! …Along with the business supplies kit. I was SO excited to open the box, my daughter and I made a little video.

I have some great ideas for cards to be featured on my blog again. I know it’s been a while, but I hope to be back, creating cards and sharing what I love. I still love cooking and Pampered Chef, and still a consultant for that, but I just miss crafting, it is one of my favorite hobbies! Plus I get to share this passion with my sister since she is a demo too, and we get together and make beautiful things!

Here is my unboxing video and stay tuned for my unboxing of the February Paper Pumpkin kit coming up soon!


Anniversary, Hunny, Paper Pumpkin, Uncategorized, Wedding

And Back to Our Scheduled Cardmaking…

Hi Friends!

Remember me? That crazy lady who’s motor home burned to the ground and was traumatized so she quit posting on her blog???

Ok, so I wasn’t “traumatized” (maybe just a wee bit stressed out???) but it has been difficult getting back into the swing of things! We were living with the in-laws when we got here, and it was difficult, especially with 3 dogs (1 was ours). Then in June, I had to put down our 14 year old dog Hunny. She was the SWEETEST dog. It was one of the HARDEST things I’ve ever had to do. I miss her every day.  Here’s a sweet picture of her exploring the snow when we first got here. Sometimes I still can’t believe she’s gone. Love you Hunny Bun. Always.

20160318_163619

In July we finally found our forever home (hopefully!) and moved in. We’re pretty much settled in now just finishing the backyard and doing some decorating. Still a ways to go but it’s wonderful. First thing was first and I took over the space under the stairs (temporarily) for my stampin space. It’s so…Harry Potter-ish! haha…My stamping space is the “cupboard under the stairs”! I love it. Here’s a pic!

20160904_012050

The kids are adjusting to this life and Wyatt is doing much better. Poor thing, you could really tell he was having a hard time when we first got here.

I’m doing home pre-school for this year for both kiddos and Sophie is in Gymnastics once a week. She LOVES it. We’re looking into soccer for Wyatt. They have some cute toddler teams out here like Soccer Buddies.

So…on to cardmaking!! I received my holiday items and I’m in love! The cookie cutter stamps and punch are SO darling. If you haven’t seen some of the products, check out my pre-order haul video HERE.

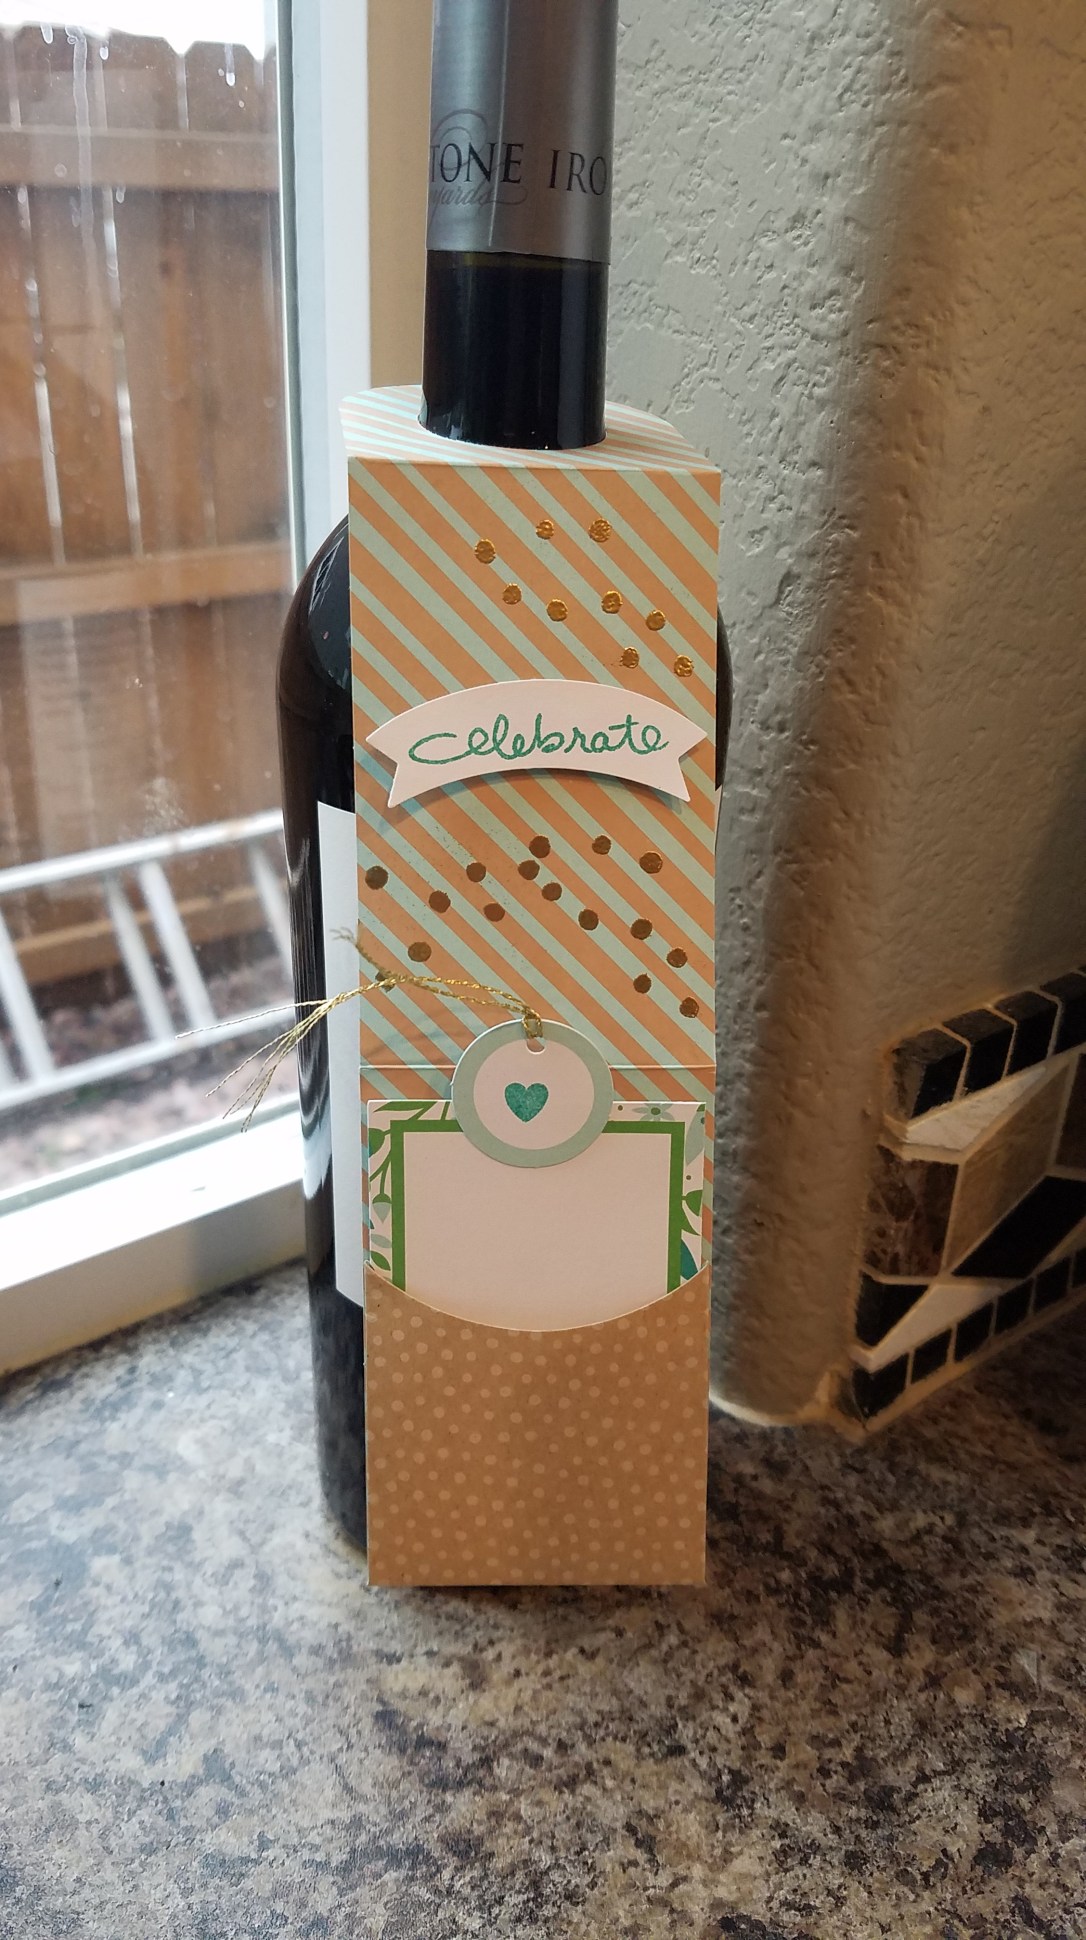
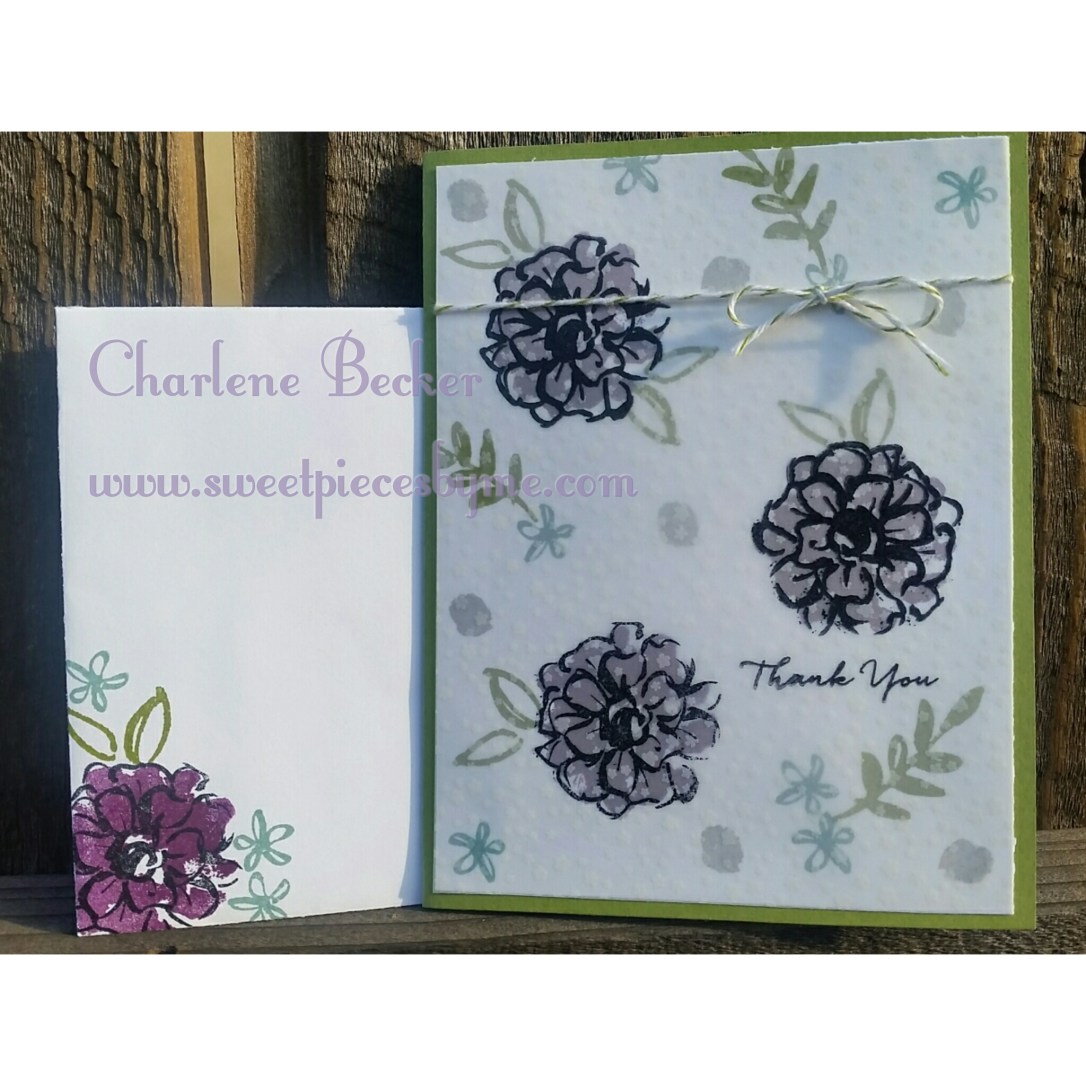
I actually wanted to share a cute alternate project (which has nothing to do with the Holiday Catty – HA!) I was in need of a wine tag and thought that the cute gift card holder from the March 2016 Paper Pumpkin – Pocketful of Cheer kit would be neat! Also, minimal work because it’s practically done for you! All I did was punch an 1-1/4″ circle into the top, did some embossing and stamping with the Endless Birthday Wishes set,  and used the pieces in the kit to add a pull tab. Then all I had to do was write on the card.

20160913_085412

Here’s a close up:

20160913_085512

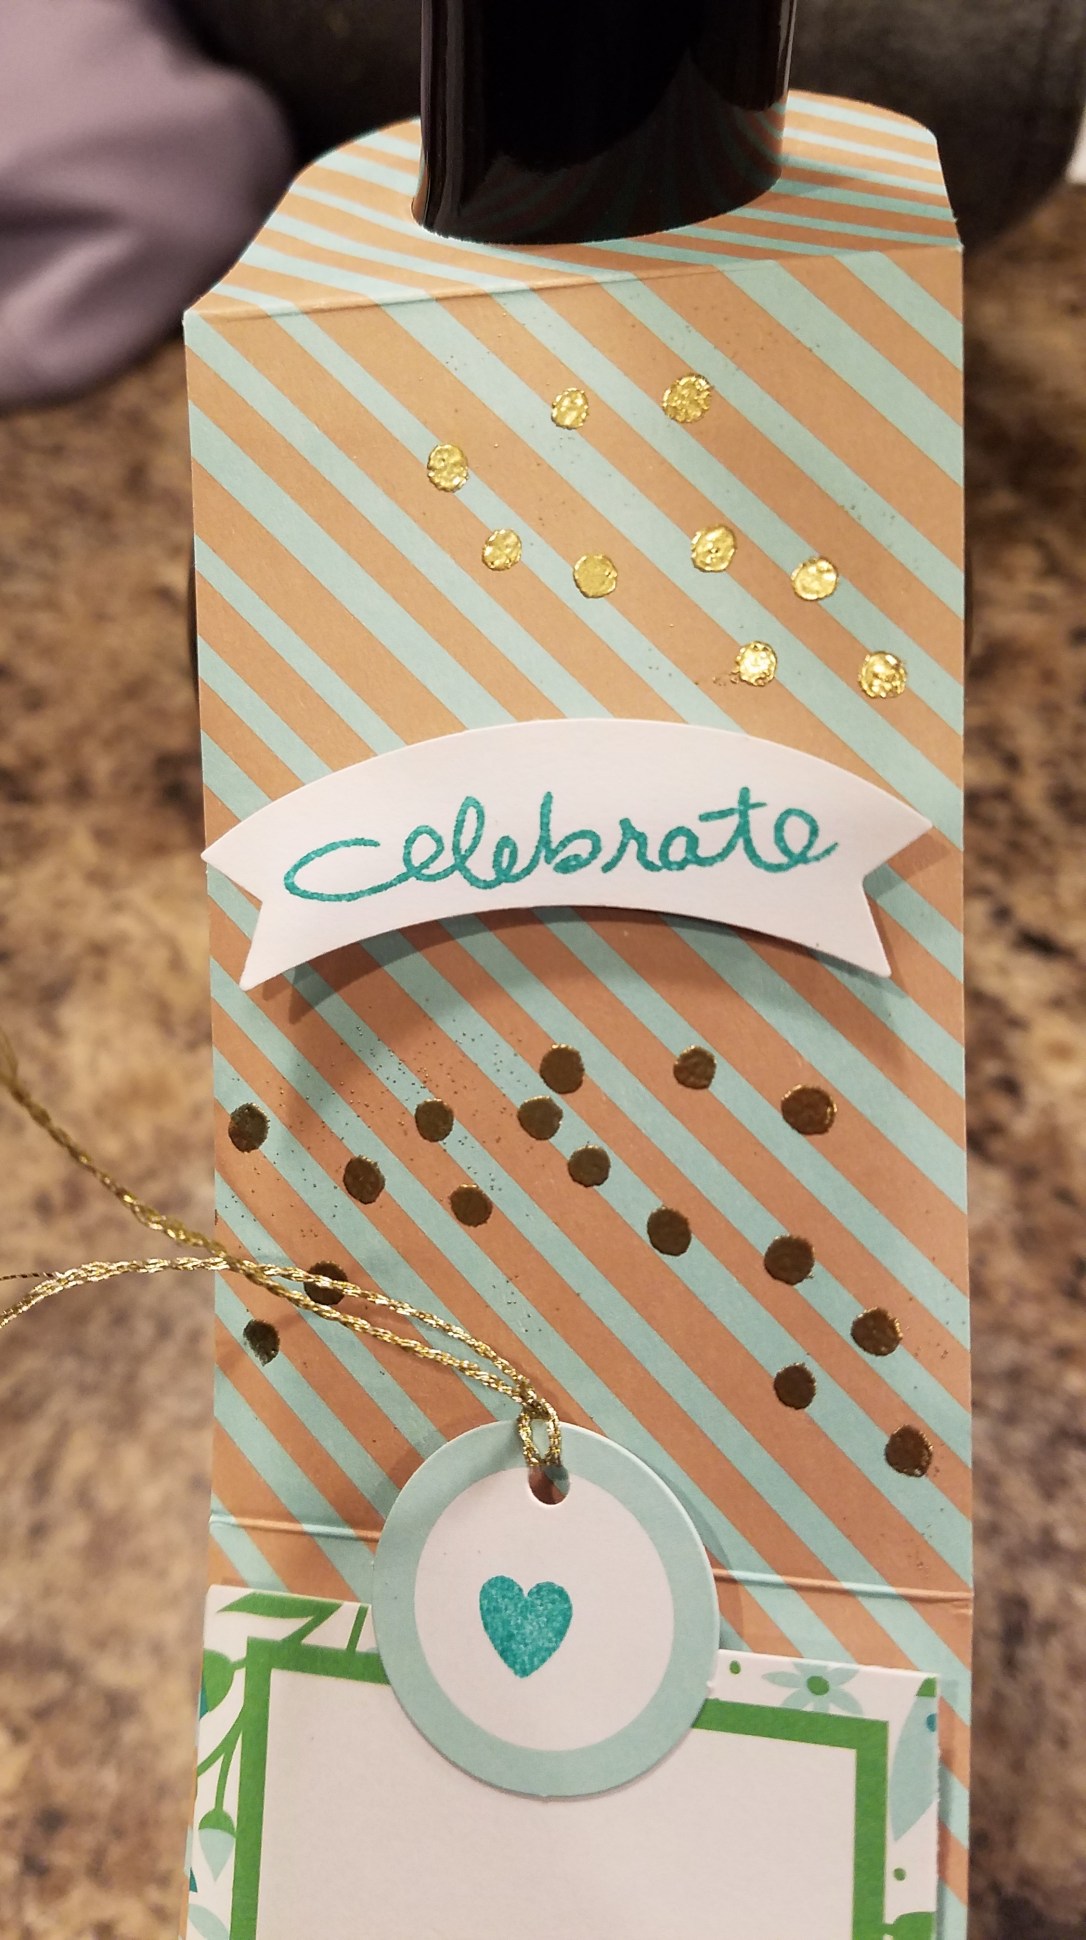
Yep, should have used the embossing buddy so I wouldn’t have the tiny specks of powder all over it! (I was being lazy! hahaha)

This tag was perfect! You could even fold it up and adhere it with washi or a mini staple if you think it’s a little long.

Well I’m so glad to be back! I hope to be posting more, making and sharing more videos and writing more (little anecdotes & short stories!). Thanks for sticking with me!

Be back soon with more stamping FUN!!!


Flowers, Sale-A-Bration, Thank You, Uncategorized

Paper Craft Crew Challenge #183 – Stampin’ Up What I Love Thank You

Hi There!

I was able to make a sweet card the other day for the Paper Craft Crew Challenge. Since we’ve been packing like crazy, I’ve just found the time to post this! This week was a color challenge. Usually these challenges do exactly that…challenge me, but I turn to Stampin’ Up’s IB & C (Idea Book & Catalog) and I find a card I love. Then I just swap the colors for what is required.

pcccs163-006

I loved the card on page 119 so I copied it but used the challenge colors. I even used the same baker’s twine in Old Olive. I love the way the outline looks using the black Staz-On ink. That’s a must have for stamping on vellum. It comes in White too!

You can get the BOTANICAL GARDENS DESIGNER VELLUM STACK & the What I Love stamp set FREE in the Sale-A-Bration catalog when you spend $100! You get 1 item FREE with every $50 purchased! 🙂

PhotoGrid_1456503632006Hope you enjoyed my card! Thanks for stopping by!  Here are the products I used to make it:


Just Because, Sale-A-Bration, Sweet, Thank You, Uncategorized

Mojo Monday #436 – You’re So Sweet!

Welcome back to another Mojo Monday challenge! Today I made a card for the Mojo Monday #436 challenge. I’m a little late as the Linky closes in about an hour, but hey, sometimes I do my best work procrastinating. Also I heard recently, if you’re not procrastinating, you’re wasting time. 😉 I really love that.

Here is the cute and fun sketch over at Mojo:

mojo436

I just love the circles and banner elements! It was a fun and simple card to run with. I made a You’re So Sweet card using the Honeycomb Happiness stamp set from the Sale-A-Bration catalog. You can still get this stamp set FREE with a $50 purchase before tax and shipping!

PhotoGrid_1456710010546


Can I just say I LOVE the It’s My Party enamel dots??? These cuties come in 3 great colors, Bermuda Bay, Crushed Curry and Melon Mambo.  They look so sweet, like little candies on my card!

I love that all of Stampin’ Up’s products coordinate so well! I had no problem matching the card stock to the embellishments to the ink! There are some really cute honeycomb embellishments in the Occasions catalog too. I didn’t use them this time around but they are adorable!

Just a little update on our move…we have 5 days to go. OMG! Today I packed up about 4 boxes of TOYS…and they have maybe 1 more. That’s way too many toys if you ask me. I see a donation run or a garage sale in our future! So we will be traveling about 1300 miles in a motorhome with 2 toddlers. I am NOT ready lol. Well, sort of. I have pinned several “traveling with toddlers” articles and ideas. I’m preparing some things that I hope will make it a smooth trip for everyone. I hope to write about our experience and what worked and didn’t work after we get there! I’ll connect a link to that post after I write it. Our family threw us a little going away party at my sister’s last night and that was really nice. (Except for a few dysfunctional family moments I won’t get into…) A little bittersweet, but we are excited to go!

Thanks for stopping by!

Charlene


Love, Uncategorized, Wedding

CYCI108 Challenge -Simple, Elegant Wedding Card

I played along with the Can You Case It Challenge 108 this week! The sketch is so simple and I loved it! Do you ever have a picture of a card in your head…but then you create it and you’re like, “Well, that didn’t turn out like I thought it would”…yeah me too. However, this card was different! I LOVE the way it turned out! It’s simple and elegant.

cyci1081

I used the February Paper Pumpkin kit, Hello Sunshine. SUCH a fun kit! One of Stampin’ Up’s best! I just added some Blushing Bride card stock, Basic Black card stock, It’s My Party design paper and washi tape. I used the mini heart punch from the Itty Bitty Accents Punch pack and punched out a little heart from the excess gold foil adhesive sheet from the kit! I also punched a Blushing Bride glimmer paper one. So cute! This is the perfect wedding card…now who’s getting married this year?? 😉

Thanks for stopping by! 🙂

PhotoGrid_1456503224237

And here are the products I used for this card: (One thing though, if you get the refill Paper Pumpkin kit, it will not have a stamp set or ink – but that’s OK, you can use ANY stamps you have!)

Anniversary, Flowers, Uncategorized

Stampin Up Happy Anniversary – Wildflower Fields

Just a quick card for today! I needed a quick anniversary card and I love the Number of Years stamp set as a go to! I also love the Wildflower Fields stamp set which you can get free for Sale-A-Bration with a $50 purchase! For my inspiration for this card, I used this card by Craft-somnia Momma. Again, I found it on Pinterest!

I used our watercolor paper for the background and just used an aqua painter dipped in Calypso Coral and drew lines across. I didn’t care if they were straight or not since that’s the beauty of it! I also used Pear Pizzazz and Crushed Curry ink pads. Aren’t those little wire bows darling? I finished it off with some cute accessories like the Metallic Sequins and the Tea Lace Paper Doilies.


PhotoGrid_1455490676942

You’ll notice below my new format for the products I used. It’s a “shopping list”. I had to switch to this since My Stampin Blog is now charging users $9.95 per MONTH. That’s just not feasible for me right now so I decided to just jot down the list of products, item #’s and their price for you. You can then click and print, save to your computer, mobile device, etc.

Also, since it is so small, I’ll try to list only the stamps and the accessories on it so I can use a bigger font. Otherwise the more items I put on there, the smaller it has to be. Hope this helps some of you!

plaodu7471b

Thanks for stopping by! See you soon.

Charlene 🙂