Cards, Christmas, Crafting, CTMH, Scrapbooking

Close to My Heart – Seas & Greetings

Have you seen the new paper line Seas & Greetings from CTMH? This design paper is so stinkin cute! It is decorated with snowmen that are outfitted in summer clothing and accessories. Can you say Christmas in a tropical location??

I love the idea of this paper so much that I did order a pack! I don’t have any island holidays, but I do have some cute papercrafting ideas for it for holiday packaging and gifts!

Here is the Cardmaking kit which is on sale if you are a VIP! I Item # VIP114. I just love the designs of these cards!

Winter Scrapbook Workshop Item# VIP113

Here is the scrapbooking kit available HERE. These pages are darling! There is always extra pieces leftover from the kits to make a few cards too! This is such a great deal since you are also getting the stamp set AND the thin cuts!

If you can’t get enough of this cute Christmas paper, please come back and join me for my 12 DAYS OF CHRISTMAS projects coming soon! These will be great for last-minute gift ideas, gift wrapping ideas, and more! I’ll be using Close to My Heart paper, Seas & Greetings, Christmas Story, and Freshly Baked.

I will start posting THIS WEEK my 1st Day of Christmas idea! See you soon and happy crafting!

Advertisement
Cards, CTMH, Scrapbooking

Smitten Product Bundle – Last Chance!

I am “smitten” with this line of products from Close to My Heart! The design paper is adorable and is great for card making or scrapbooking! One side of the paper is pretty neutral too for any kind of pages.

Last chance because there are limited quantities left! You can shop my store page HERE to order yours today!

Here are some of the sample cards I made using the supplies from the kit.

Smitten Products

I also took my leftover papers and stickers and created my own layouts.

You can shop on my site 24/7 at http://sweetpiecesbyme.closetomyheart.com. Thank you for visiting my blog! Happy crafting!

CTMH, VIP

Are you a VIP Customer?

If you’re not, now is a great time to sign up! Or if you are, but your membership is expiring, this is a great time to renew!

The VIP program is a chance to earn shopping credit on your purchases while getting access to exclusive product and perks! Pay $35 and get $15 in VIP Credit when you sign up! (yearly membership)

What perks you say? Perks such as this Flower Shop Card Kit! This is an exclusive kit for only VIP customers!

VIP Flower Shop Card Kit $29.95 VIP103

The VIP Flower Shop Card Box comes with materials for creating and storing 15 beautiful cards. With pre-printed card bases, envelopes, an exclusive stamp set, stamping block, and mini ink pad all included, the only thing you need to add is your favorite adhesive! With a variety of interchangeable stamp sentiments, this kit makes it easy to whip up the perfect card for all kinds of occasions. Store your completed cards in the eye-catching box where they’ll be ready for you when you need them.

Get your exclusive kit and card box before supplies run out!!

Doggie, Sale-A-Bration, Stampin up, Sympathy Card

Happy Tails – Pup Sympathy Card

Hey All,

Hope you are having a great day, and if you are near Denver/Colorado Springs, I hope you made it through the blizzard. I miss the snow& those majestic mountains! I wouldn’t have minded a couple of snow days myself;)

Recently also in Colorado Springs, my mother had to put down their family dog, Dawson. He was the sweetest German Shepherd that I’ve ever known. A big, fluffy, sweet, bear of a dog. I will miss his heart.

I wanted to make her a sympathy card since I know that would cheer her up a little, so this is what I came up with. I made this quick, easy card in about 10 minutes. I even made a tutorial if you would like to check it out HERE

I made 2 versions of the card, which one do you like better? I’ve linked all the materials needed for the card below. Thanks for stopping by, and please comment to let me know you were here! 🙂

Big announcement coming soon!!! xoxo


Kit, Paper Pumpkin, Stampin up, Thank You

Paper Pumpkin February 2019 Grown with Kindness- Alternative Cards

Hi Ya’ll!

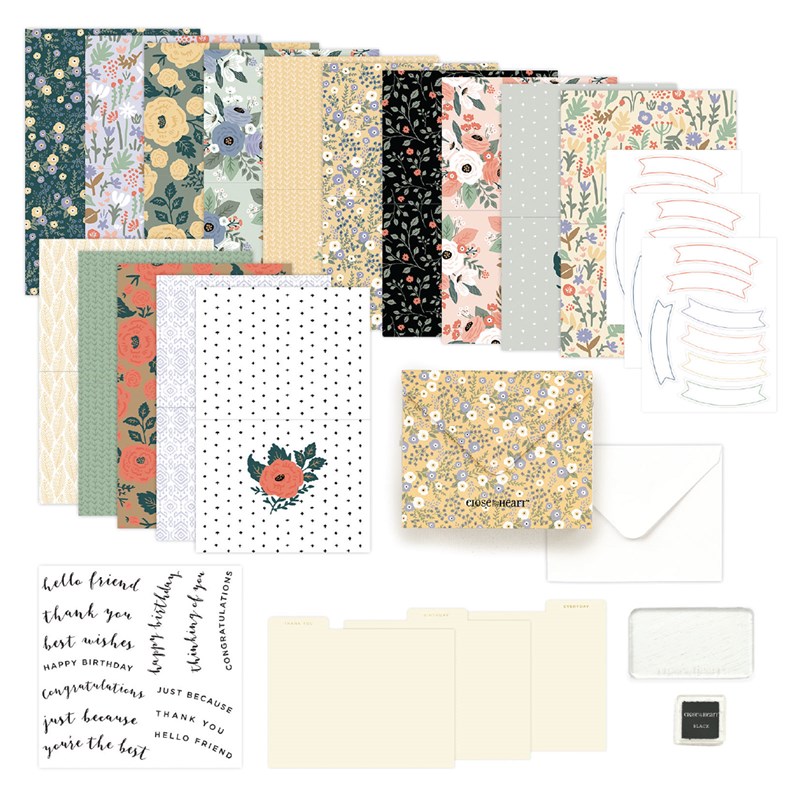
I just wanted to share with you 2 alternative cards you can make using all of the supplies in the February 2019 Grown with Kindness Paper Pumpkin kit. You do not need anything additional to make these! Unless you want to use your own adhesive.

Card #1: (The one on the left)

Items you will use:
1 Black Card Base
1 Piece of vellum, 1 Sheet of the succulents in the cups, 1 Sheet of the succulents

Let’s start with the first card and the measurements. I’m just keeping this high level, so if you would like the step by step, please check out my You Tube video HERE.

First you’ll cut the top off of the coffee cup succulent paper right at the top of the skinny cactus in the brown cup.  Cut the white part off so that piece will be 2″ x 1-7/8″. Save the other pieces with the little bit of green on it for the #2 card. Then turn it and cut it down the middle of that same cactus so that piece will be 3″ tall by 1-3/8″. Next cut the succulent paper into 3 sizes, 1-6/8″ x 1-3/8″, 2″ x 1-1/2″ and 2″ x 1-1/4″. Stamp your sentiment on the white piece in Fresh Fig. Then adhere all of the pieces cut as shown with the adhesive dots or a tape runner to the piece of vellum. Then turn it over and only put adhesive on the backs of where the paper is, so none of the glue will show through the vellum. Then you can adhere the vellum to the black card stock. Add 3 of the clear enamel dots and you are done!
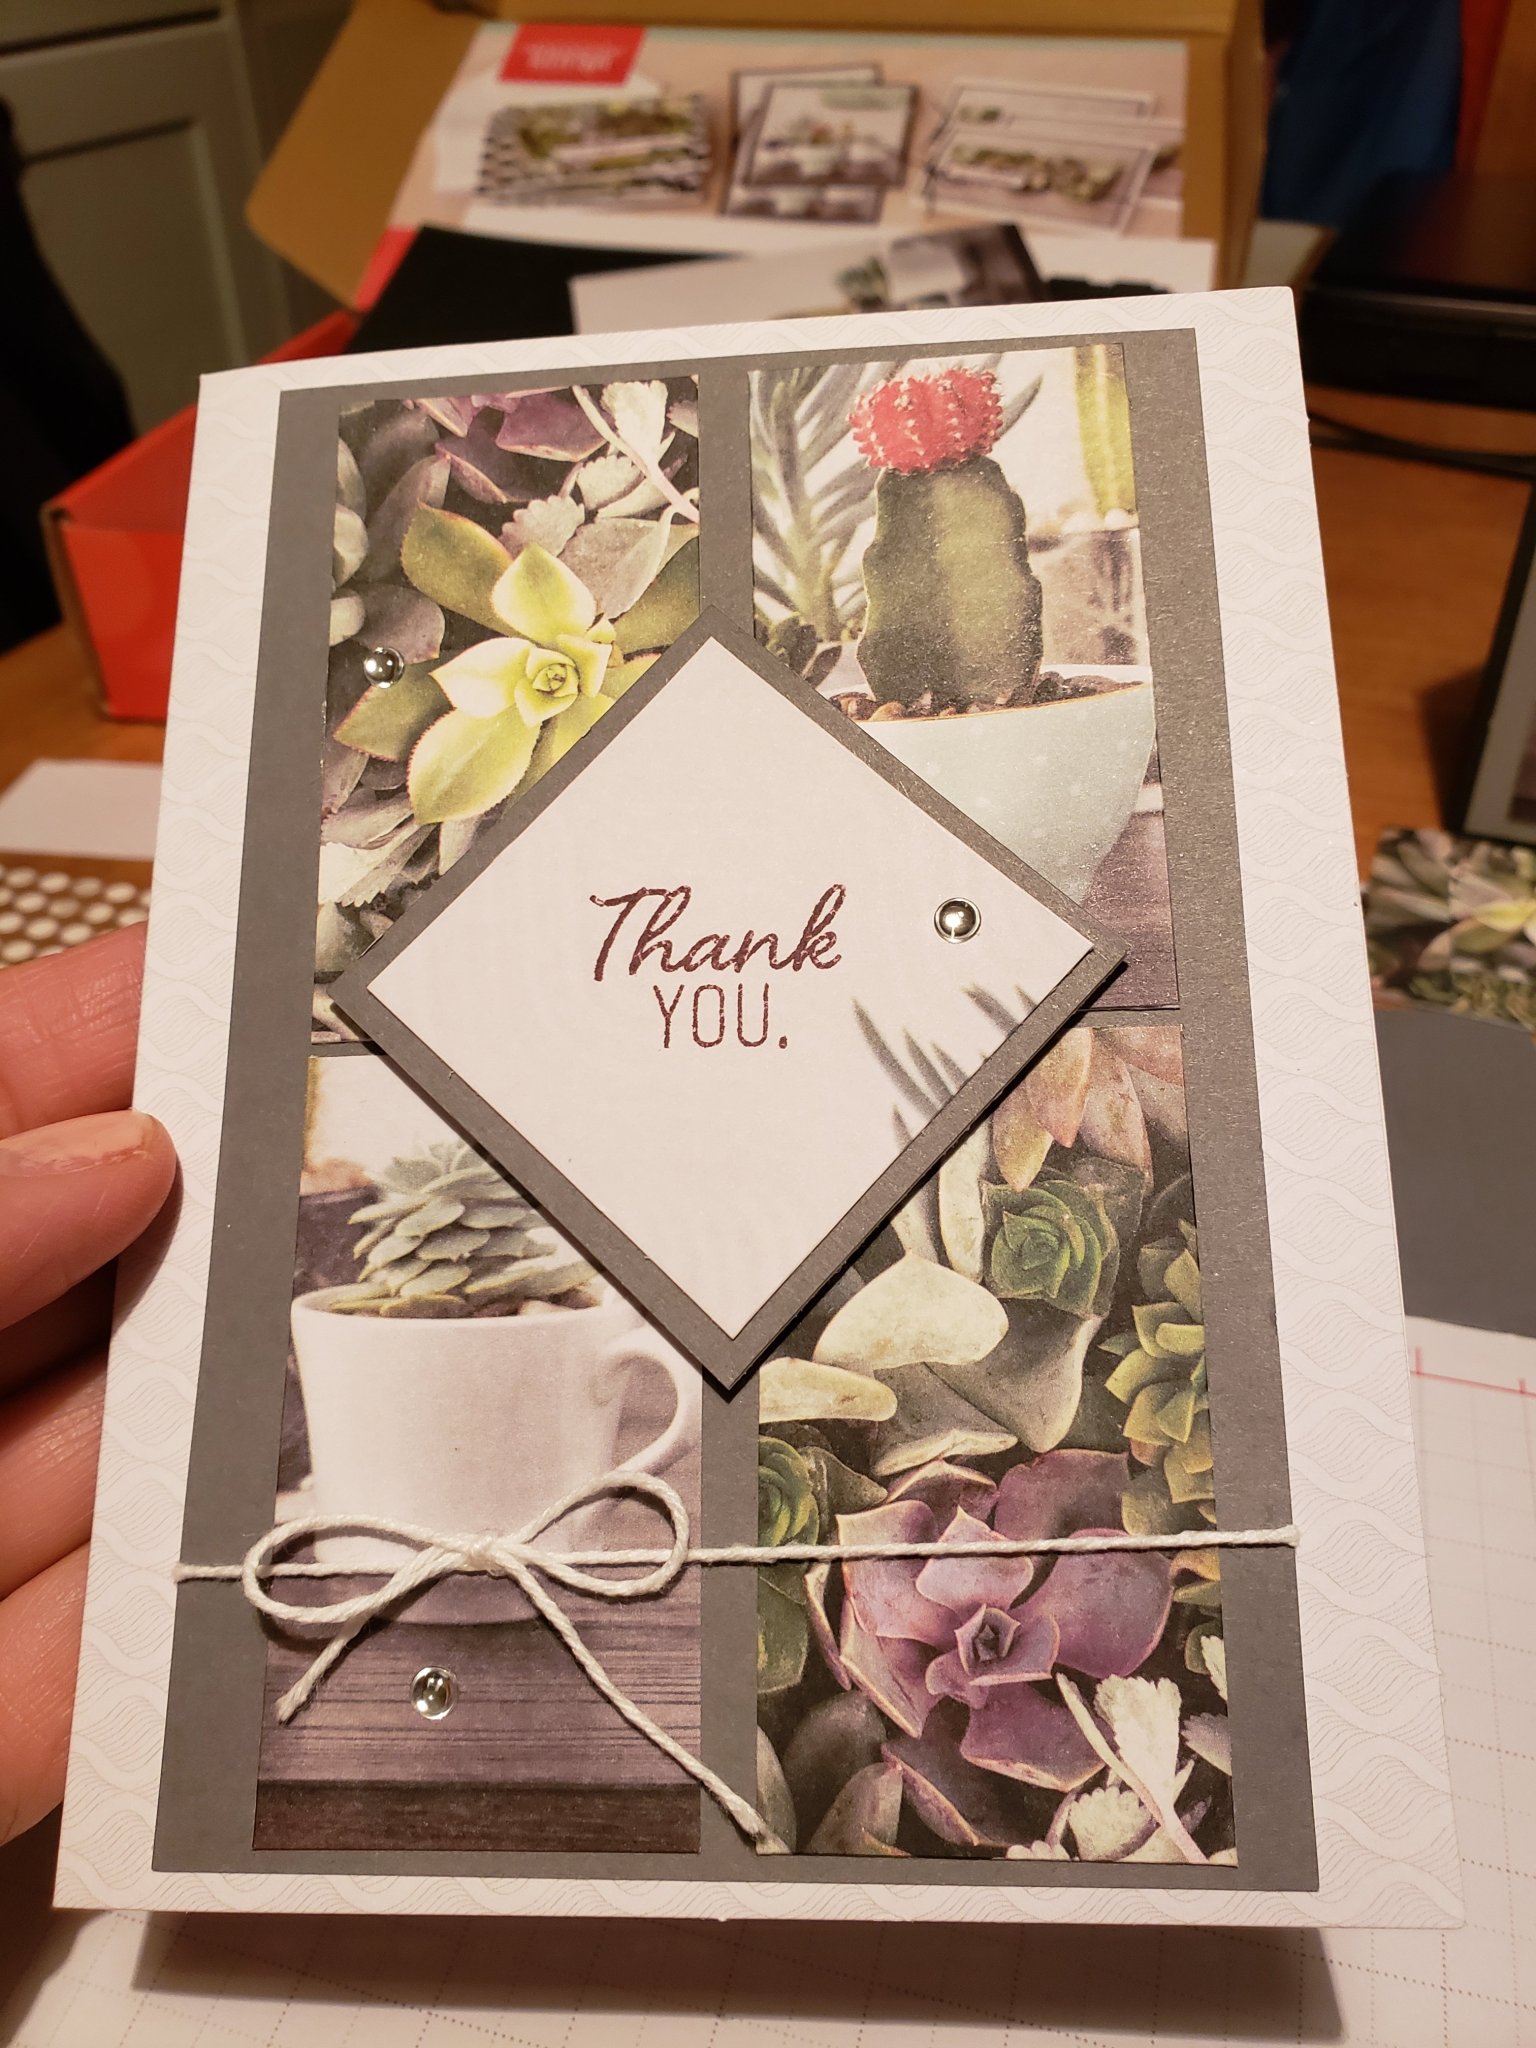
20190223_204456978880731388758946.jpg

For Card #2:

Items you will use:

1 white card base, 1 piece of gray card stock, plus 1 other piece of gray,

1 Sheet of the succulents in the cups, 1 Sheet of the succulents

Stamp your sentiment on the white square that we set aside from Card #1. Adhere it to the gray card stock and cut around it. Just leave about 1/4″ border around it. Then you will cut 4 pieces of the succulent paper all the same size, 2-1/2″ x 1-3/8″. Adhere those evenly to the larger piece of gray card stock. Then tie the white baker’s twine around the back and adhere. I usually make a separate bow and then adhere that to the front with a glue dot. Adhere 3 clear enamel dots and then you are done!

I hope you enjoyed making these cards as much as I enjoyed making the tutorials!


20190223_2005076539193617388662139.jpg


Remember, if you subscribe before March 10th, you will get your 1st kit in March which will include an acrylic block and a full size stamp set! You can subscribe using my personalized link HERE.

I hope you had fun making these cards, I’ll be sure to post alternatives every month so please come on back to check them out. If you get a chance I would love for you to subscribe to my You Tube channel too 🙂 Then you will get first notification when I post new tutorials and do giveaways!

Enjoy!

Charlene xoxo