Masculine, Retirement, Uncategorized

Mojo Monday 434 – The Open Sea, A Nautical Retirement Card

Hi Everyone!

I just LOVED this sketch and playing along over at Mojo Monday this week! I feel like my creative “Mojo” was flowing with this card! 🙂

Just the elements on this sketch went along perfectly with the stamp set The Open Sea. So here is the Mojo Monday #434 sketch.

Mojo434

I was excited to see that the circles went perfectly with the 1 globe stamp in the set. If you like this set you will LOVE the stamp set called Going Global HERE. It has a similar theme but it comes with some GREAT sentiments and matches so nicely with the Going Places DSP.

PhotoGrid_1455412326247

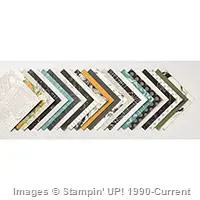
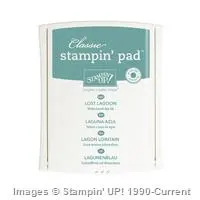
I’m loving this new Design Paper Stack, Going Places. It has some great neutral colors like Very Vanilla, Basic Black, Lost Lagoon and Mossy Meadow. For this card I used the “blueprint” style paper in Lost Lagoon. I love the Very Vanilla thick baker’s twine, it looks like rope! I thought it added the perfect embellishment to my nautical themed card. I’m also glad that Teeny Tiny Wishes comes with a Happy Retirement stamp. Can’t believe I used it twice this year already! This is a great set of 26 versatile sentiments! If you don’t own it, I highly recommend it! 🙂

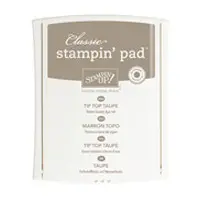
I also stamped some of the images in Tip Top Taupe on the Very Vanilla because I didn’t see any DSP’s with these colors and I wanted a light background. It came out perfectly! Love how Stampin’ Up makes it easy to create our own matching design paper when we need it!

Thanks so much for stopping by! Leave some love 🙂

Also, here are the items I used to make this card:


Advertisement
Birthday, Sale-A-Bration, Uncategorized, Valentine

Mini Treat Bag – It’s My Party, Sale-A-Bration

tmp_3532-PhotoGrid_1454797664406-1174672854

Hi Guys!

#1 – I just LOVE the mini treat bag from Stampin’ Up!….#2, I love making treats for my friends and loved ones!

This die is perfect for just that. I can’t wait to use it to make cute treat bags for my kid’s school parties too. Oh, and their birthday party favors! I can see getting use out of this product for years to come! 🙂

Here is a sweet little treat bag I designed for my class using just the Mini Treat Bag Thinlits!  I love the colors of the It’s My Party Design Paper…so bright and cheery! There’s Melon Mambo, Crushed Curry, Basic Black and Mint Macaron, to name a few. I created a card first at 3-1/4″ x 4-3/4″ using Whisper White. Then I added some DSP at 3″ x 4-1/2″. I punched a scalloped tag topper using Melon Mambo and finished it with a washi tape covered clothespin and baker’s twine. I stamped Happy Valentine’s Day using Teeny Tiny Wishes.

tmp_3532-20160206_1129171188815832


Then I made the cutest little treat bag using the Mini Treat Bag die and the Botanical Gardens Designer vellum stack (Sale-A-Bration Item!) I found out that using vellum is tricky with the Big Shot…but here is how I set up my “sandwich”:

  1. Magnetic Platform
  2. Vellum
  3. Mini Treat Bag Thinlit die
  4. 2 sheets of printer paper or grid paper (cut down to fit through the BigShot)
  5. Cutting plate

It MAY be different for you because of the different calibrations of all the BigShots. This is because we all use them with different sized dies and the number of times used makes a difference! Just try to troubleshoot and you’ll come up with what works for your own machine. The first time I tried it using a different “sandwich” I didn’t have “creases” but instead the thinlit cut all the way through.

After I put together my treat bag using Fast Fuse (I find this is great for vellum!), I cut out some banners to adhere to the front of my bag. I used the It’s My Party DSP Stack. You get 48 sheets of this paper! Such a great deal! Here are the sizes of the 3 banners:

  1. 2″ x 3″
  2. 2-1/2″ x 1-1/4″
  3. 2″ x 3/4″

Then I added a Blushing Bride Glimmer paper heart using the elements that come from the treat bag thinlits, a strip of hearts using Basic Black cardstock and a cute little wire bow embellishment! Perfect for dessing up this little bag. I know it’s a little “fancy”, but that’s what I was going for 😉  Thanks for stopping by! Be sure to follow my blog to see future projects and video tutorials!

tmp_3532-20160206_112820-1627799823